Creating Menus
Learn how to add menu items, create custom menu items, and add sub-menus to organize your website navigation. Follow these steps to structure menus:
Add Menu Items
Navigate to Site settings.

Select Menu settings.

Select Add Menu Item.

Choose a page from the list of published pages.
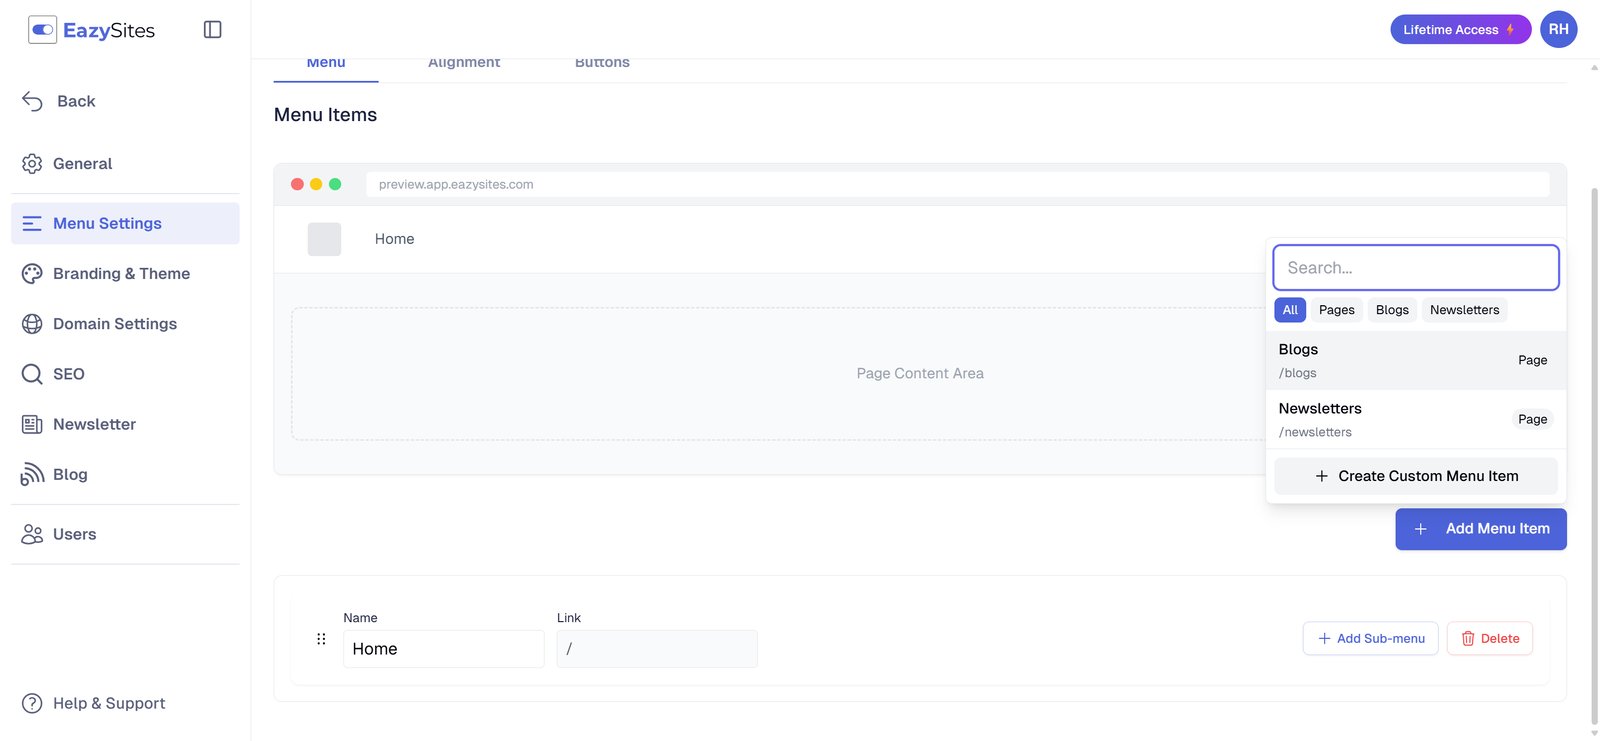
Click Save to apply.

Create Custom Menu Items
Select Add Menu Item.

Choose Create Custom Menu Item.

Enter a menu name.

Enter the link URL using a forward slash
/followed by the page slug (example:/about).

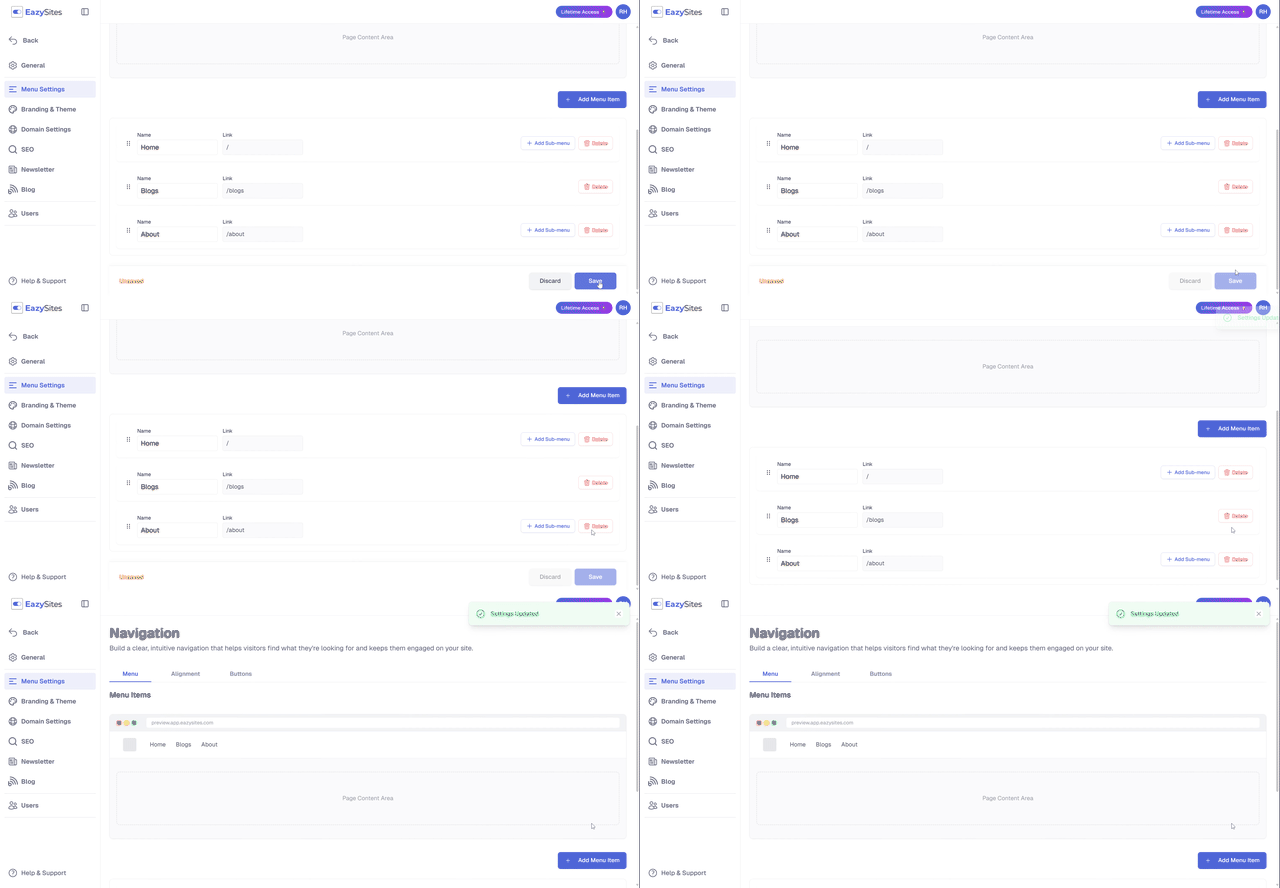
Select Add Item.

Click Save to apply.
Add Submenu Items (Dropdowns)
Select Add Menu Item.

Choose Create Custom Menu Item.

Enter the menu name

Enter
#as the Link URL for self-referencing items.
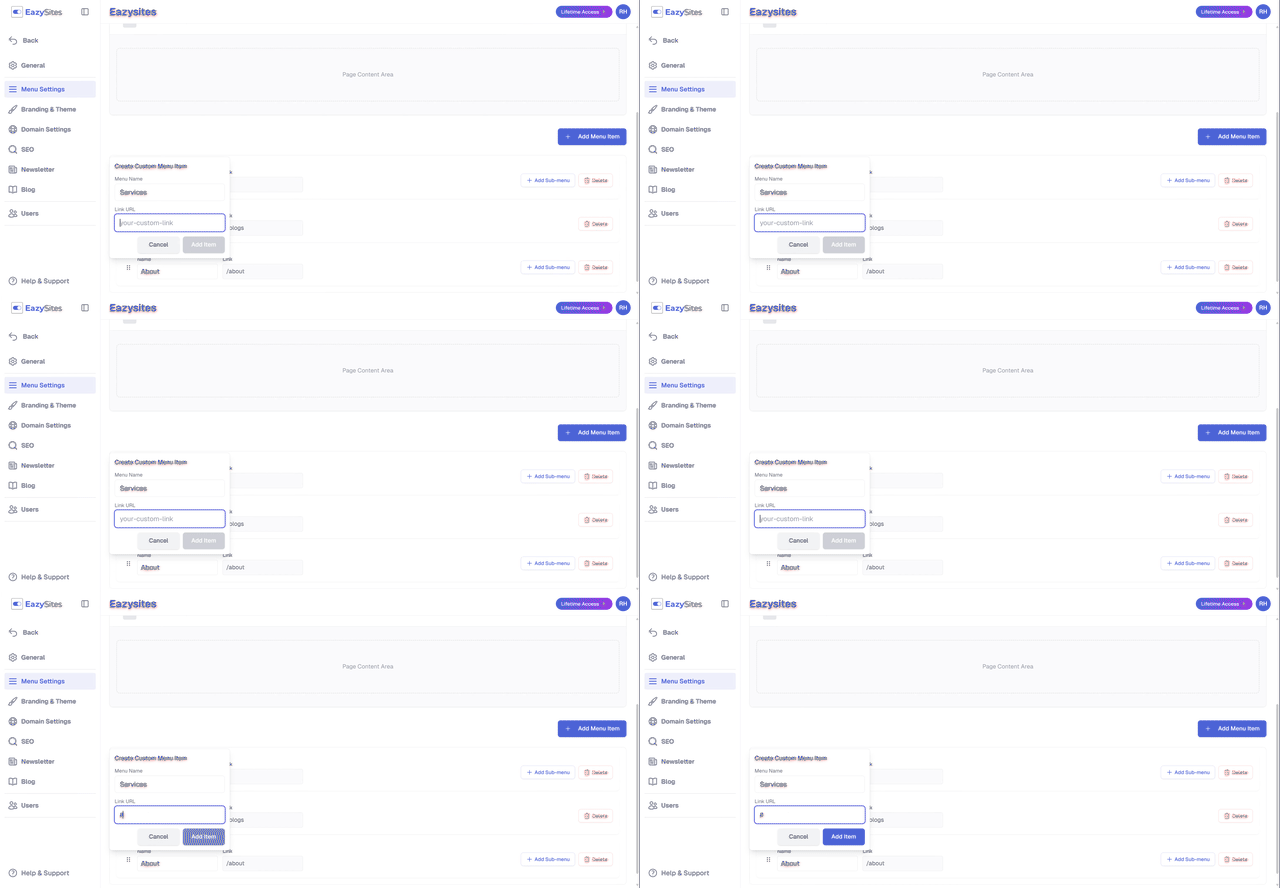
Select Add Item.
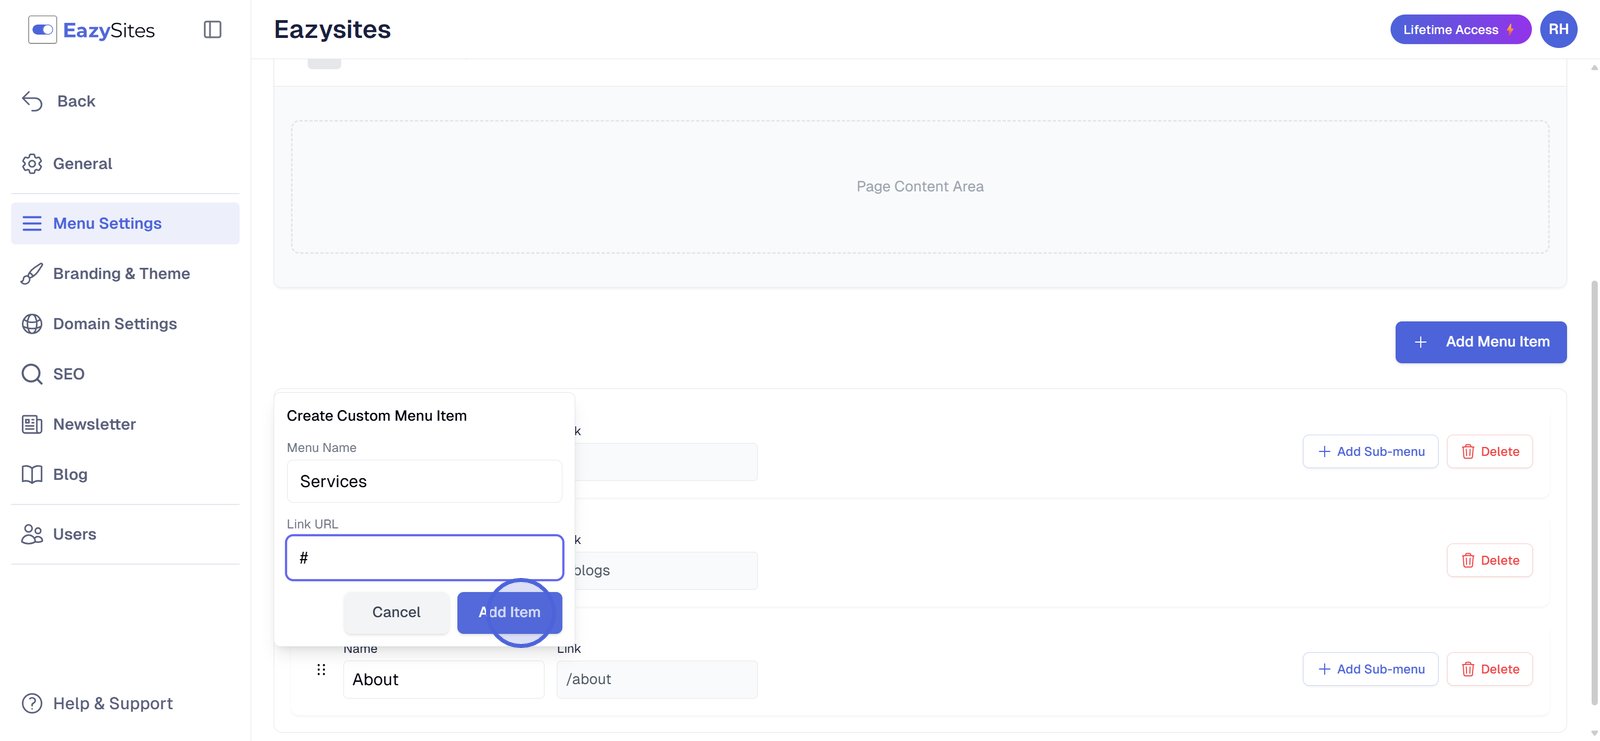
Within the new menu item, select Add Sub-menu.

Choose Create Custom Item.

Enter the submenu name.

Enter the link URL using a forward slash
/followed by the page slug.

Select Add Item.

Use the same steps to add more submenu items.

Click Save to apply.
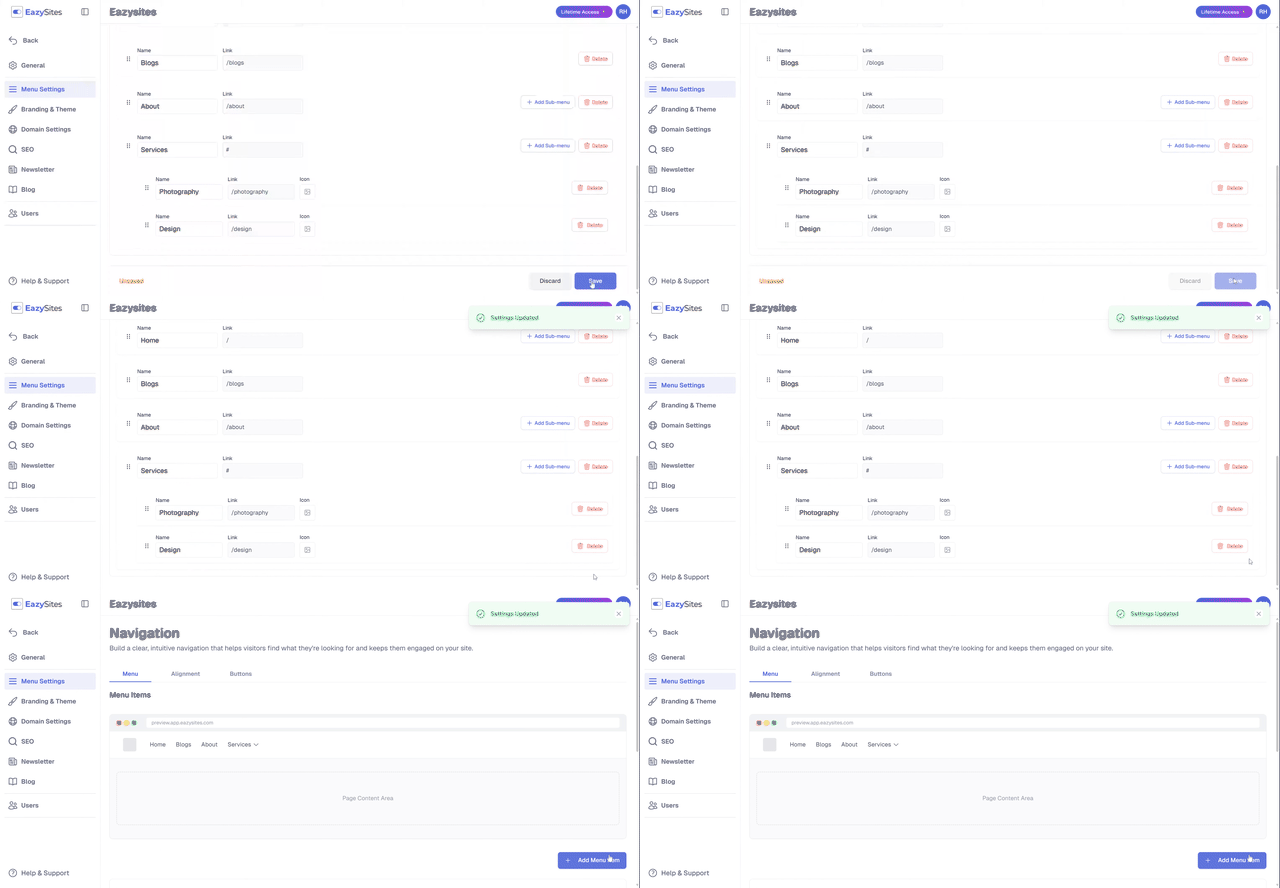
Menu structure defines how users access content throughout the site. Standard items link directly to published pages, while custom items provide flexibility for linking. Submenus create a hierarchical structure, organizing content under a single heading and ensuring consistent navigation across all sections.
Written by Adam • Last updated: 9/10/2025