Add a New Block
This guide outlines the process of building and organizing a website layout using content blocks. Follow the steps below to insert, customize, move, duplicate, and remove blocks.
Add a New Block
Click Add New Block.
This opens a library of content blocks to choose from.

Choose a Pre-Designed Block
Scroll through the block library and select a pre-designed block.
These blocks offer dynamic layouts for direct use.

Customise the Block
Click on the block to open its customisation settings.
Adjust content, layout, images, text, and additional elements.

Access More Block Options
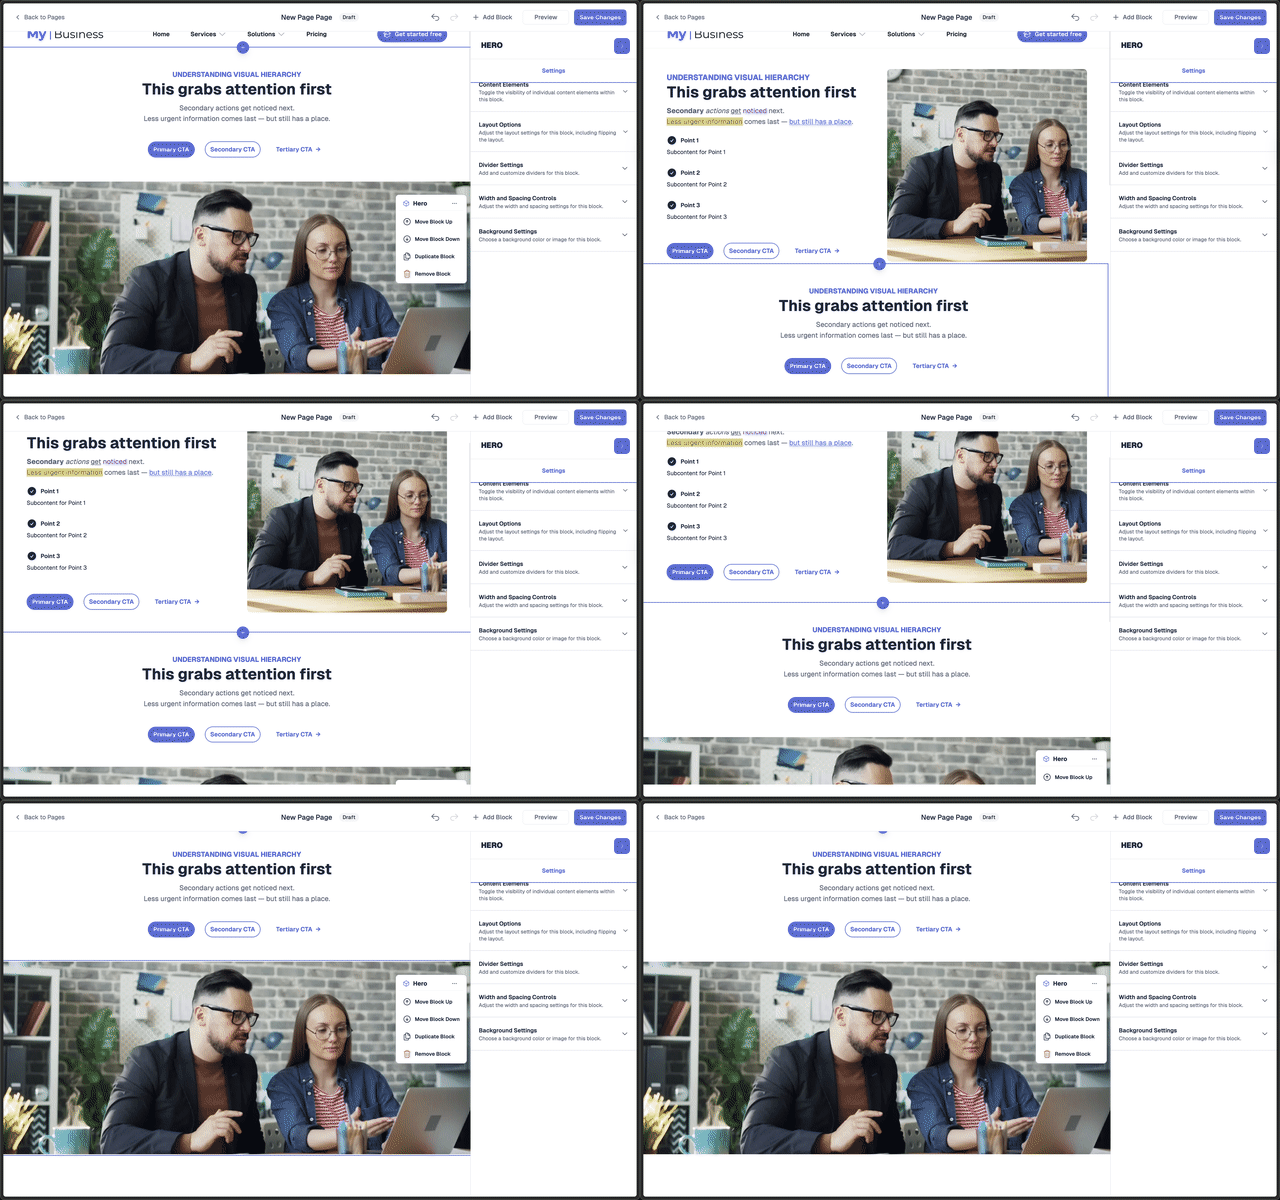
Click the More Options (⋮) icon located on the block toolbar.
This menu provides the following actions:
Duplicate Block
Move Block Up/Down
Remove Block

Reorder Your Blocks
Change the order of blocks using two ways:
Option A: Use Move Commands
Select Move Block Up or Move Block Down from the More Options menu.

Option B: Drag-and-Drop
Click, hold, and drag the block to a new position.

Duplicate a Block
From the More Options menu, select Duplicate Block.
This duplicates the block for reuse or refinement.

Remove a Block
To remove a block, choose Remove Block from the More Options menu.
This helps keep the page organized.

Tips
Preview your changes frequently to see how your layout looks in real time.
Mix and match different blocks to create engaging, professional-looking pages.
Written by Adam • Last updated: 9/12/2025